

Table of Contents
- What You'll Need Before You Start
- Best Blade for Holographic Vinyl
- Holographic Vinyl Cut Settings for Your Machine
- Step-by-Step: How to Cut Holographic Vinyl Cleanly
- Holographic Vinyl Weeding Tips for Clean Results
- Is Holographic Vinyl Design Harder Than Matte?
- Common Mistakes to Avoid
- Frequently Asked Questions
Last Updated: October 9, 2026
What You'll Need Before You Start
Cutting holographic vinyl cleanly requires the right tools and setup. Without proper equipment, you'll struggle with ragged edges, incomplete cuts, and wasted material. The good news is that most sign makers and creative professionals already have what they need.
Start with a vinyl cutter machine compatible with your holographic vinyl. All major brands work with holographic materials. You'll also need a cutting mat with proper grip, holographic vinyl is thicker than standard vinyl, so a mat designed for heavier materials prevents slipping.
A sharp blade is non-negotiable. Dull blades tear the material instead of cutting cleanly. Keep replacement blades on hand, as holographic vinyl dulls blades faster than matte finishes.
Beyond the machine, gather these essentials:
- Weeding tools (hook and spatula)
- Transfer tape for application
- Ruler or measuring tape
- Craft knife for detail work
- Cleaning cloth for the mat
- Cutting mat with adequate grip
At Holographicvinyl, we recommend starting with a sample pack before committing to full rolls. The Holographic sample pack includes Plain, Glitter, Smashed Glass, and High Tack finishes. Testing these on your machine costs just £4.95 and saves you from expensive mistakes later.

Best Blade for Holographic Vinyl
The blade you choose makes the difference between clean cuts and frustration. Standard vinyl blades work, but holographic vinyl performs best with a sharp, quality blade designed for thicker materials.
A 45-degree blade is the industry standard for holographic vinyl. This angle cuts through the material cleanly without excessive downward pressure that can damage the backing. Some machines use 60-degree blades, which work but require careful pressure adjustment.
Blade sharpness matters more than blade type. A fresh blade cuts holographic vinyl in a single pass. A dull blade requires multiple passes, which creates rough edges and increases the risk of material slipping during cutting.
Replace your blade every 2-3 metres of cutting, depending on material thickness and your machine's pressure settings. Holographic vinyl is denser than standard vinyl, so blades dull faster. Keep a stock of replacement blades to avoid interrupting your workflow.
Check blade condition by making a test cut on scrap material. If the edge looks ragged or the machine struggles to cut through in one pass, swap the blade immediately. A new blade costs far less than wasted holographic vinyl.
Holographic Vinyl Cut Settings for Your Machine
Machine settings determine whether your cuts are clean or compromised. The correct pressure, speed, and blade depth prevent tearing whilst ensuring complete cuts through the backing.
Start with these baseline settings for most vinyl cutters:
- Pressure: 80-100% (adjust upward if cuts are incomplete)
- Speed: 5-10 cm per second (slower for intricate designs)
- Blade depth: 1-2mm (just enough to cut backing without gouging the mat)
These are starting points, not fixed rules. Your machine, blade sharpness, and material thickness all affect the ideal settings. Test cuts on scrap material before running your full design.
Holographic vinyl requires slightly higher pressure than matte vinyl because of its thickness. If your machine allows multi-pass cutting, use two lighter passes instead of one heavy pass.
Temperature affects how holographic vinyl cuts. Cold material is stiffer and may require slightly higher pressure.
Document your successful settings. Write down the exact pressure, speed, and blade depth that produced clean cuts. When you switch to a different holographic finish or width, you'll have a reference point instead of starting from scratch.
Step-by-Step: How to Cut Holographic Vinyl Cleanly
Cutting holographic vinyl cleanly follows a logical sequence. Each step builds on the previous one, and skipping or rushing any step compromises your results.
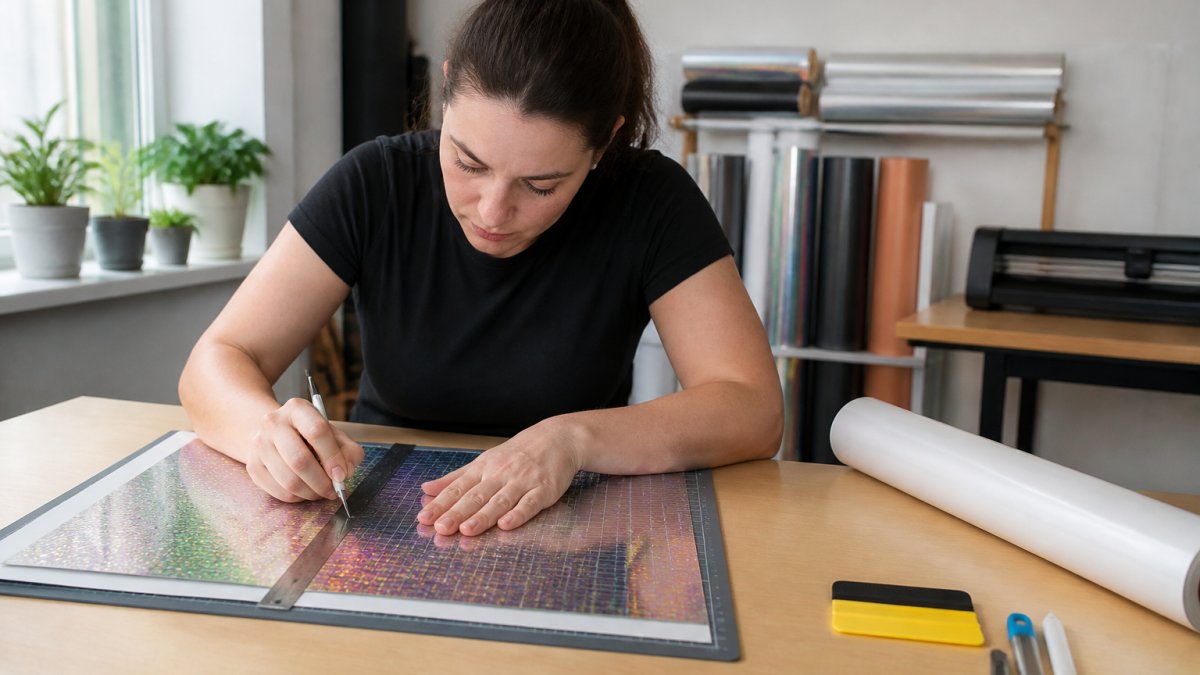
Prepare Your Material
Start by inspecting your holographic vinyl roll. Look for any visible damage, creases, or inconsistencies in the finish. If the material shows defects, contact your supplier before cutting.
Unroll the vinyl and lay it flat on your cutting mat. Smooth out any wrinkles with your hand, working from the centre outwards. Air bubbles under the material cause the vinyl to shift during cutting, resulting in misaligned designs.
Ensure the cutting mat is clean. Dust, debris, or dried adhesive on the mat reduces grip and allows the vinyl to slip. Wipe the mat with a damp cloth and let it dry completely before loading your material.
Position your design file in your machine's software. Double-check that the design size matches your intended cut. Measure the vinyl width and confirm your design fits within it, accounting for at least 5mm margin on each side.
Load and Secure the Vinyl
Feed the holographic vinyl into your machine's feed guides. The material should sit straight and parallel to the machine's cutting direction. Misaligned vinyl produces skewed cuts that won't align with your design.
Secure the vinyl using the machine's rollers or clamps. Apply firm but even pressure, too loose and the vinyl shifts, too tight and you risk damaging the material. The vinyl should be held in place without any visible movement when you gently tug it.
Set your blade depth using your machine's adjustment mechanism. For holographic vinyl, aim for a depth that cuts through the vinyl and backing without gouging the mat. A shallow cut leaves the backing intact; a deep cut damages your mat.
Load your blade into the blade holder, ensuring it's seated fully and locked in place. A loose blade produces inconsistent cuts and can damage your machine.
Execute the Cut
Start the cutting process slowly. Watch the first few centimetres of your design to ensure the blade is cutting cleanly and the vinyl isn't shifting. If you notice problems, pause and adjust before continuing.
For intricate designs with many small details, reduce your machine's speed. Slower cuts give the blade time to cut cleanly through the material without tearing. Complex shapes require 5-10 cm per second; simple designs tolerate 15-20 cm per second.
Listen to your machine as it cuts. A consistent, quiet cutting sound indicates proper blade contact. A grinding or squealing sound suggests the blade is dull or the pressure is too high. Stop and investigate before continuing.
Once the cut is complete, remove the vinyl from the machine carefully. Don't pull forcefully, support the material as you lift it to prevent tearing at the edges.
Holographic Vinyl Weeding Tips for Clean Results
Weeding is where many cuts go wrong. A clean cut can be ruined by aggressive weeding that tears the design or leaves adhesive residue. Patience and proper technique preserve your work.
Use a weeding hook to lift the negative space (the parts you're removing). Start at the edge and gently peel away unwanted vinyl. The hook should slide under the vinyl rather than dig into it.
Work slowly and deliberately. Rushing through weeding creates tears and ragged edges that undermine your clean cut. Take breaks if you're working on a large design, fatigue leads to mistakes.
For delicate designs with thin lines, use a weeding spatula instead of a hook. The flat edge provides more control and reduces the risk of tearing fine details.
Remove all weeding debris from your design before applying transfer tape. Leftover vinyl particles stick to the tape and create visible imperfections on the finished product.
Is Holographic Vinyl Design Harder Than Matte?
Holographic vinyl isn't inherently harder to design for than matte vinyl. The difference lies in how the material behaves during cutting and application, not in design complexity.
The main challenge is that holographic vinyl's thickness means your machine settings must be precise. A design that cuts perfectly in matte vinyl might tear in holographic if your pressure isn't adjusted. This requires testing and small adjustments rather than major design changes.
Visually, holographic vinyl is actually easier to work with. The rainbow shift makes designs pop without extra embellishment. A simple shape in holographic vinyl often looks more striking than a complex design in matte vinyl.
Where holographic vinyl differs is in weeding. The thicker backing requires more care during removal. Small, intricate designs take longer to weed cleanly. Larger, bolder designs weed quickly and produce excellent results.
The light-reflecting finish hides minor bubbles and wrinkles that would be obvious in matte vinyl.
Common Mistakes to Avoid
Most cutting problems stem from a handful of preventable mistakes. Learning what goes wrong helps you avoid frustration and wasted material.
Using a dull blade. This is the single most common error. A dull blade requires multiple passes, creates ragged edges, and wastes material. Replace your blade regularly, it's the cheapest insurance against poor results.
Incorrect pressure settings. Too much pressure forces the blade through the backing and damages your mat. Too little pressure leaves the backing intact. Start with the recommended settings and adjust gradually based on test cuts.
Dirty cutting mat. Dust and debris reduce grip, allowing the vinyl to shift during cutting. Clean your mat before every job. A clean mat is the foundation of consistent, clean cuts.
Rushing the weeding process. Aggressive weeding tears fine details and leaves rough edges. Weeding takes time, accept that and work slowly. The time you invest in careful weeding is visible in the final product.
Skipping test cuts. Testing on scrap material before running your full design prevents expensive mistakes. A 30-second test cut saves you from wasting a roll of holographic vinyl.
Not accounting for material thickness. Holographic vinyl is thicker than standard vinyl. Designs that work in matte vinyl sometimes need adjustment for holographic. Test your design on a sample before committing to the full roll.
Applying transfer tape incorrectly. Transfer tape that's applied unevenly or with air bubbles causes your clean cut to look messy on the finished product. Smooth the tape carefully and press out all air bubbles before removing the backing.
Cutting holographic vinyl cleanly is achievable with the right setup and technique. The process isn't complicated, it's simply a matter of using sharp blades, correct machine settings, and careful weeding. Start with a Holographic sample pack to test your equipment before investing in full rolls. Once you've dialled in your settings, you'll produce consistently clean cuts that make your designs stand out. Whether you're creating bespoke stickers for an Etsy shop or premium vehicle graphics for clients, proper technique transforms holographic vinyl into a reliable material that delivers professional results every time.
Frequently Asked Questions
Why is my holographic vinyl tearing when I cut it?
Tearing usually occurs when blade pressure is too high or the blade is dull. Start with lower pressure settings and work upward in small increments until the blade cuts through without forcing. A sharp blade designed for vinyl will cut cleanly without resistance. If your vinyl still tears, check that your material is properly secured on the mat and that your blade is making full contact with the surface. Holographic vinyl's reflective coating can make tearing more visible, but the underlying issue is typically blade pressure or blade condition.
Do I need a deep-point blade to cut holographic vinyl?
A standard 45-degree blade works well for holographic vinyl and is the recommended starting point. Deep-point blades (60-degree) are designed for thicker materials and typically aren't necessary. The key is using the correct pressure and speed settings for your machine rather than switching to a specialised blade. Test your settings on a small scrap first. If you're cutting intricate designs with thin lines, a sharp standard blade will give you cleaner results than a deep-point blade used at incorrect pressure.
What are the best blade settings for holographic vinyl?
Start at the lower end and increase pressure only if the blade doesn't cut through fully. Test on scrap material first. Every machine and blade age varies, so these are starting points rather than fixed rules. The goal is a clean cut where the backing separates from the vinyl without tearing either layer. Once you find your machine's sweet spot, write it down for future projects.
How do I know if my holographic vinyl will cut cleanly on my equipment?
The best approach is to test before committing to a full roll. Holographicvinyl's sample pack includes swatches of Plain, Glitter, Smashed Glass and High Tack finishes so you can test each on your machine and see how the rainbow shift looks in your own light. This eliminates guesswork and lets you dial in your exact blade pressure and speed before running a production job. Testing takes minutes and saves the cost of wasted stock if the material doesn't perform as expected on your equipment.