

Table of Contents
- What You'll Need Before You Start
- Cleaning Surfaces Before Vinyl Application
- Cutting and Weeding Your Holographic Design
- Best Transfer Tape for Holographic Vinyl
- Applying Holographic Adhesive Vinyl to Your Surface
- How to Remove Air Bubbles from Vinyl Decals
- Common Mistakes to Avoid
- Frequently Asked Questions
Last Updated: September 28, 2026
What You'll Need Before You Start
Before you apply holographic adhesive vinyl, gather the right tools and materials. Getting this step wrong wastes stock and frustrates clients with poor results.
You'll need a vinyl cutter compatible with your chosen holographic vinyl, transfer tape, a squeegee or application tool, a clean work surface, and cleaning supplies.
The quality of your vinyl matters enormously. At Holographicvinyl, we supply holographic vinyl engineered specifically for clean cutting and reliable application. Our Plain Holographic 4Mil vinyl and High Tack Plain Holographic 5Mil option both cut and weed cleanly, taking transfer tape well and holding colour indoors and out.

If you're new to holographic vinyl, start with a sample pack to test on your equipment before committing to a full roll. This saves money and prevents costly mistakes on client projects.
| Tool/Material | Purpose | Notes |
|---|---|---|
| Vinyl cutter | Precision cutting | Compatible with all brands |
| Holographic vinyl | Base material | Choose 4Mil or 5Mil thickness |
| Transfer tape | Application aid | Essential for clean transfer |
| Squeegee | Bubble removal | Firm pressure, smooth strokes |
| Cleaning supplies | Surface prep | Removes dust and grease |
Cleaning Surfaces Before Vinyl Application
The surface you're applying to determines whether your vinyl sticks or peels. Most application failures trace back to skipped cleaning.
Remove all dust, grease, and debris from your surface. Use a clean cloth or lint-free wipe with mild soap and water. For greasy surfaces, isopropyl alcohol works well. Let the surface dry completely before proceeding.
This step takes five minutes but prevents hours of rework. A poorly cleaned surface causes adhesion issues that show up immediately or fail within weeks, damaging your reputation and wasting client money.
Pay special attention to edges and corners where dust collects. These areas fail first if not cleaned properly. For vehicle wraps or outdoor signage, cleaning becomes even more critical because weather exposure amplifies any adhesion weakness.
Cutting and Weeding Your Holographic Design
Cutting holographic vinyl cleanly requires the right machine settings and material quality. Poor cuts create weeding nightmares that waste time and frustrate your workflow.
Set your vinyl cutter to the correct pressure and speed for holographic material. Start conservative, too much pressure tears the material, too little leaves incomplete cuts. Test on a scrap piece first.
Holographic vinyl cuts differently from standard vinyl because of its reflective coating. The coating can catch light and create shadows during cutting, so work in good lighting and check your cuts carefully. Weeding becomes much easier when cuts are clean and complete.
Weed your design carefully, removing all excess material. Use a weeding tool or craft knife to lift away unwanted pieces. For intricate designs, patience here saves frustration later. Rushing weeding causes torn edges that look unprofessional when applied.
The holographic vinyl from Holographicvinyl cuts and weeds cleanly because it's engineered for this purpose.
Best Transfer Tape for Holographic Vinyl
Transfer tape makes the difference between a smooth application and a frustrating mess. The wrong tape either sticks too hard or doesn't grip the vinyl at all.
Choose transfer tape with medium tack for holographic vinyl. Too much tack rips the delicate material during removal. Too little tack leaves the vinyl behind on the backing when you need it on your application surface.
Clear transfer tape works best because it lets you see your design alignment before pressing it down. This visibility prevents misalignment and gives you confidence during application.
Apply transfer tape firmly but not aggressively. Press it down with a squeegee using moderate pressure, working from the centre outward. This removes air pockets and ensures the tape bonds properly to the vinyl without damaging the holographic finish.
When you're ready to apply, peel the transfer tape back slowly at a low angle. Rushing this step or peeling at a steep angle causes the vinyl to lift off prematurely, leaving pieces behind on the backing. Slow, controlled peeling keeps your design intact.
Applying Holographic Adhesive Vinyl to Your Surface
This is where all your preparation pays off. Proper application technique determines whether your work looks professional or amateur.
Positioning Your Design
Position your holographic vinyl carefully before pressing it down. Once transfer tape makes contact with your surface, repositioning becomes difficult without damaging the vinyl.
Use a ruler or straight edge to mark your placement. For vehicle wraps and large signs, snap a chalk line to guide alignment. For smaller stickers and decals, pencil marks work fine.
Place the vinyl slowly, starting from one edge and working across. This controlled approach lets you catch alignment issues before the entire piece is pressed down. If something looks wrong, lift gently and reposition before pressing harder.
Squeegeeing and Removing Air Bubbles
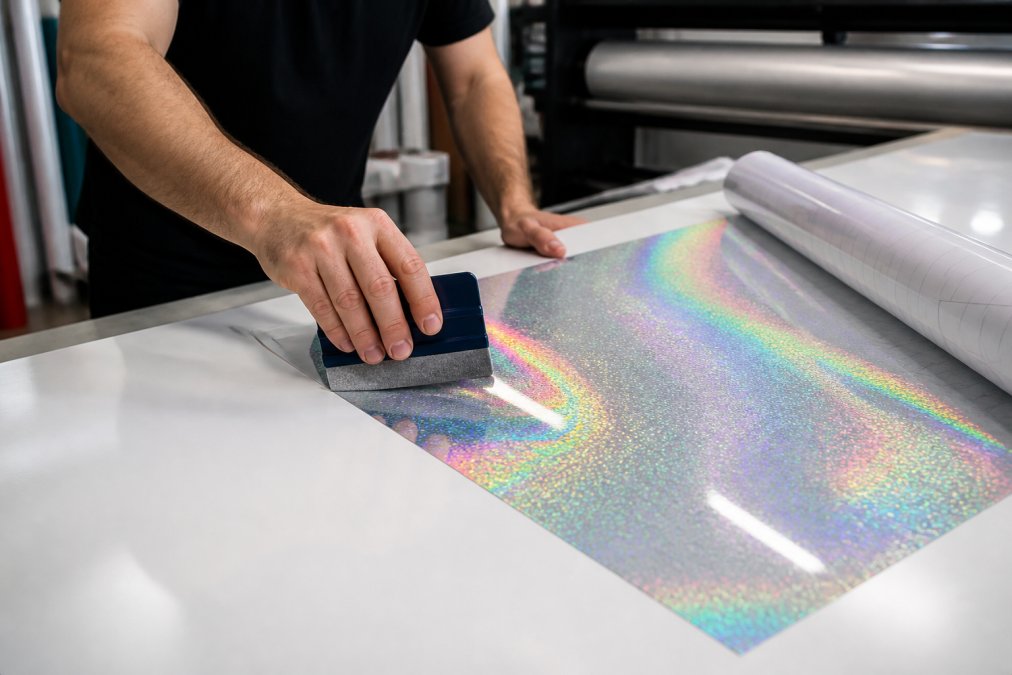
Once your vinyl is positioned, squeegee from the centre outward using firm, even pressure. This technique pushes air bubbles toward the edges where they escape.
Use a squeegee or hard plastic tool with a rounded edge. Avoid sharp corners that can scratch the holographic finish. Work in overlapping strokes, covering the entire design multiple times to ensure complete contact.
Apply consistent pressure throughout. Too light and air bubbles remain trapped. Too hard and you risk stretching the vinyl or damaging the holographic coating. Medium firm pressure, applied evenly, gives the best results.
For large designs, squeegee in sections. Divide the vinyl into quarters and work each section thoroughly before moving to the next. This prevents missed areas and ensures uniform adhesion.
How to Remove Air Bubbles from Vinyl Decals
Air bubbles trapped under vinyl look unprofessional and weaken adhesion. Removing them requires the right technique.
Small bubbles under 5mm often disappear on their own within 24 hours as the adhesive sets and pressure equalises. Larger bubbles need manual removal.
For visible bubbles, use a fine needle or pin to pierce the bubble carefully. Make a tiny hole at the edge of the bubble, not in the centre. This lets air escape while keeping the vinyl in place. Use your squeegee to press the air out through the hole.
For stubborn bubbles, lift the vinyl edge nearest the bubble and re-squeegee that section. This forces air out and re-bonds the vinyl. Work slowly and deliberately, rushing causes new bubbles or wrinkles.
If a bubble won't budge after these attempts, accept it and move on. Overworking the vinyl causes more damage than leaving a small bubble. Most clients never notice minor imperfections, especially on textured surfaces.
Common Mistakes to Avoid
Most application failures come from preventable mistakes. Learning what goes wrong saves time and protects your reputation.
Skipping surface cleaning. This is the number one cause of premature failure. Dust and grease prevent proper adhesion. Spend five minutes cleaning properly instead of spending hours dealing with peeling vinyl.
Using incorrect squeegee pressure. Too light and bubbles remain. Too hard and you stretch the vinyl or damage the holographic coating. Medium firm, consistent pressure works best.
Rushing the weeding process. Incomplete weeding causes torn edges that look rough when applied. Patience during weeding prevents this entirely.
Applying in cold conditions. Adhesive doesn't bond properly below 10°C. Wait for warmer weather or warm your application surface with a heat gun before applying.
Peeling transfer tape at the wrong angle. Steep angles pull the vinyl away from the surface. Peel slowly at a shallow angle, keeping the tape nearly parallel to the surface.
Applying to dirty or wet surfaces. This is the fastest way to guarantee failure. Always clean and dry thoroughly before starting.
Choosing the wrong transfer tape. Medium tack is your friend. Too much tack damages holographic vinyl. Too little leaves the vinyl behind.
Our material is engineered to cut cleanly and weed easily, which eliminates many common problems. But even quality vinyl fails if application technique is poor.
Applying holographic adhesive vinyl correctly transforms how your work looks and how long it lasts. The steps are straightforward: clean properly, cut cleanly, position carefully, squeegee thoroughly, and remove bubbles methodically.
Quality vinyl makes this process easier. Holographicvinyl's holographic vinyl cuts and weeds cleanly, takes transfer tape well, and holds its colour for years.
Frequently Asked Questions
Do I need to use transfer tape when applying holographic adhesive vinyl?
Yes, transfer tape is essential for applying holographic adhesive vinyl successfully. It holds your design together during the transfer process and prevents small pieces from shifting or getting lost during application. After positioning the vinyl, you peel the transfer tape back slowly at a low angle to leave your design on the surface. Quality transfer tape ensures clean weeding and reliable adhesion.
What's the best way to prevent air bubbles when applying holographic vinyl?
Start by squeegeeing from the centre of your design outwards using firm, steady pressure. This pushes air towards the edges rather than trapping it underneath. Work slowly and use overlapping strokes to ensure complete contact. If bubbles appear after application, use a fine needle or pin to puncture them, then squeegee gently around the area to release trapped air. Proper surface cleaning beforehand also reduces bubble formation.
How long should I wait before cleaning holographic vinyl signage after application?
Wait at least 24 hours before cleaning or exposing your holographic vinyl to water or harsh conditions. This allows the adhesive to cure fully and bond properly with the surface. For best durability, avoid heavy use or contact for the first 48 hours. Once cured, your holographic vinyl will maintain its colour and finish for years if applied to a properly prepared surface.
Can holographic adhesive vinyl be applied to curved surfaces?
Holographic adhesive vinyl can be applied to gently curved surfaces, though results depend on the curve's radius and the vinyl's thickness. High Tack varieties with air release technology handle curves better than standard options. For tight curves, apply the vinyl slowly and use a squeegee to work out air gradually. Test on a small area first, or order a sample pack to check compatibility with your specific curved surface before committing to a full roll.